Vacuum Brush Roll Cleaning Protocol: Remove Hair Without Damaging the Roller
ProtocolQuick picks
| Product | Key Specs |
|---|---|
| See price on Amazon |
|
| See price on Amazon |
|
Product availability, certifications, and retailer details can change; check the current Amazon page before buying.
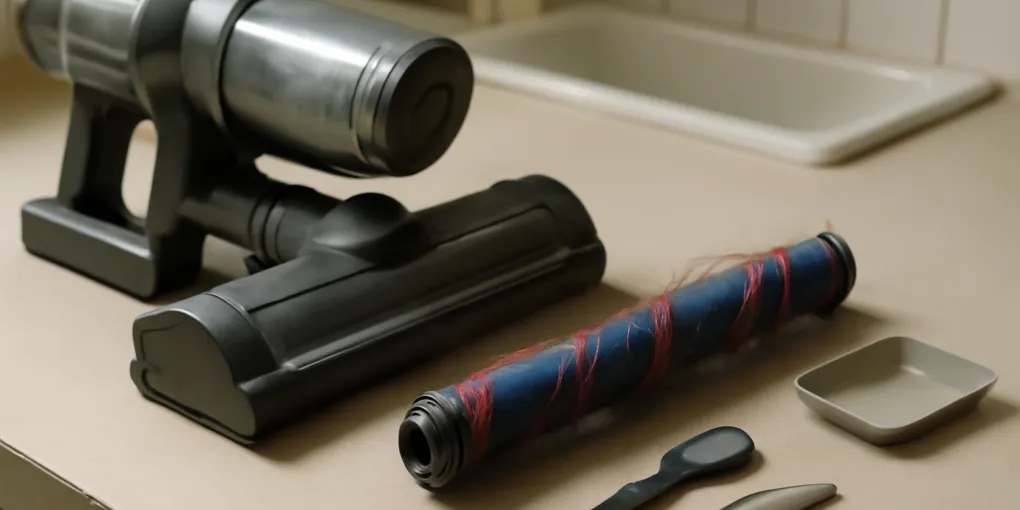
A hair-wrapped brush roll is a maintenance problem, not a reason to buy another storage bin. Long hair, pet fur, thread, and carpet fibers tighten around the roller and collect at the end caps. Pickup can fall, the head can sound different, and a belt or motorized assembly may be placed under extra load.
The safe procedure depends on the vacuum. Shark’s maintenance instructions for applicable models tell users to turn the vacuum off and remove the battery before servicing, then inspect the brush roll and clear debris. The exact access steps differ by floorhead (Shark support manual example). Find your model number and manual before opening a cover.
Stop and find the model instructions first
Do not improvise if any of these apply:
- The brush roll is inside a powered floorhead with no obvious release.
- The roller has a soft woven surface rather than stiff bristles.
- A drive belt is exposed.
- The head contains lights, sensors, or anti-tangle combs.
- The vacuum is hot, smells burned, or makes a grinding sound.
- The manual says the roller is not user-removable.
Unplug a corded vacuum. For cordless models, switch it off and remove the battery if the manufacturer instructs you to do so. Never service a powered head while it is attached to power.
Tools that fit the job
Set up on a bright table or floor protected by a washable towel.
- The exact model manual
- A shallow tray for screws or clips
- A capped seam ripper or the manufacturer’s supplied hair-removal tool
- The exact screwdriver bit if a cover is screwed down
- A dry microfiber cloth
- A small soft brush for dry debris
A capped seam ripper search is useful because its short cutting edge can slide beneath a narrow band of hair. A WORKPRO precision screwdriver search is a bounded option when the manual specifies small screws. Do not use a knife pointed toward the roller, and do not substitute the wrong driver bit.
The brush-roll cleaning sequence
1. Photograph the assembled head
Take one reference photo of the cover, release tabs, and roller orientation. This is especially useful when one end cap has a different shape or when several small fasteners are involved.
2. Open only the user-serviceable cover
Follow the manual’s latch, coin-slot, or screw sequence. Put every loose fastener directly in the tray. Do not pry a seam that the manual does not identify as an access point.
3. Lift the roller only if permitted
Note which end sits near the belt or drive socket. If the roller does not lift with light pressure after the specified release, stop. Forcing it can crack a cover or dislodge a drive part.
4. Cut across the hair in short sections
Place the roller on the towel. Slide the seam ripper under hair along a groove designed for cutting, if the roller has one. Cut away from your supporting hand. Work in short sections and pull loosened hair outward.
Keep the cutter away from:
- rubber drive belts
- soft roller fabric
- bristle tufts
- end-cap seals
- electrical contacts
- anti-tangle combs
Do not drag the blade around the full circumference. One controlled line is easier to inspect.
5. Clear both end caps
Hair commonly packs into the narrow gap at each end. Remove only the caps the manual says are removable. Use fingers or a soft brush for loose debris. Do not oil bearings unless the manufacturer specifically requires it; household oil can attract dust or damage incompatible materials.
6. Wipe, but do not automatically wash
Use a dry or barely damp cloth on hard surfaces. Washing rules vary. A washable soft roller may need a long air-dry period, while another powered roller must never be submerged. Follow the model instruction and reinstall only when every washable part is fully dry.
7. Reassemble and hand-spin
Seat the drive end and free end in the original orientation. Replace the cover and fasteners without overtightening plastic threads. Before reconnecting power, turn the roller by hand if the design allows. It should move without trapped hair scraping the housing.
8. Run a short floor test
Reconnect the battery or plug only after the head is closed. Test on a clear hard-floor patch for a few seconds. Stop if the roller does not turn, a warning remains, the cover lifts, or the head makes a new sound.
Diagnose what you see
| Finding | Likely next action | Do not do |
|---|---|---|
| Hair only around the center | Cut in the roller groove and pull sections free | Saw through bristles |
| Hair packed at one end | Check the manual for removable end-cap access | Pry off a sealed cap |
| Roller is clean but does not spin | Reseat it once, then consult support or service guidance | Keep running the motor |
| Belt looks stretched, cut, or displaced | Stop and use the specified replacement/service path | Fit a generic elastic belt |
| Soft roller is stained but turning normally | Follow model-specific washing guidance | Soak the powered head |
| Burning smell or melted plastic | Disconnect power and arrange service | Perform another test run |
Build a maintenance cue that matches hair load
A calendar-only schedule misses the real trigger. Inspect the roller when emptying the dust bin after a hair-heavy room, after vacuuming thread from a craft area, or when the brush-roll indicator changes. Keep the capped seam ripper and correct screwdriver in a small tool pouch near the vacuum, but out of child reach.
This article is about the roller. Use the vacuum attachment storage protocol when the crevice tool and upholstery head are what keep disappearing.
Frequently Asked Questions
- Inspect it after several hair-heavy cleaning sessions and whenever pickup changes, the roller sounds different, or a brush-roll warning appears. The model manual takes priority.
- Only if the manual permits removal and the scissors can stay clear of the belt, bristles, wiring, and roller surface. A capped seam ripper often offers more controlled access.
- Do not assume so. Some hard brush bars can be rinsed, some soft rollers have specific washing and drying instructions, and some motorized heads must stay dry. Check the exact model manual.