Quick picks
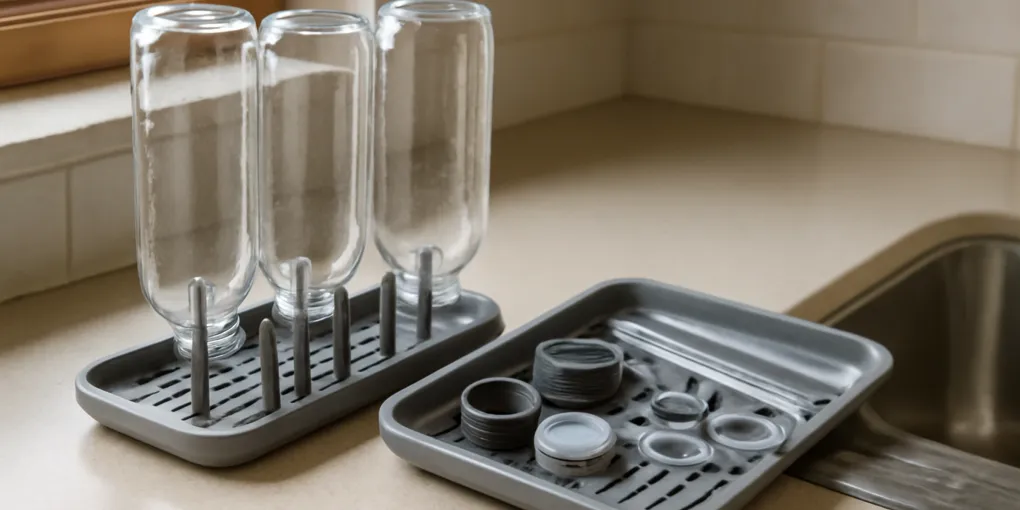
Vertical bottle drying rack
★ Top pick Best counter reset- Best For: Tall bottles, travel mugs, shaker cups, and daily school bottles
- Caveat: Needs enough air space so bottles do not touch while drying
Small lid and straw parts bin
Best missing-parts fix- Best For: Caps, bite valves, straws, gaskets, and cleaning brushes
- Caveat: Use a washable bin and empty trapped water after each reset
Long bottle cleaning brush set
Best cleaning support- Best For: Narrow bottles, straw lids, and silicone gasket channels
- Caveat: Brushes need their own drying spot or they become part of the damp pile
Reusable water bottles create a strange kind of kitchen clutter: they are washable, useful, and used every day, yet they pile up beside the sink because they are awkward to dry. Tall bottles tip over. Lids trap water. Straws vanish. Silicone gaskets stay damp in the wrong drawer.
This protocol turns the sink-side bottle pile into a small drying station with a limit. If the larger kitchen problem is food storage, pair this with our guide to refrigerator organization or kitchen counter organizers. Bottles need their own air-drying workflow.
Quick picks
- Main rack: Search Amazon for bottle drying racks if tall bottles fall over on dish towels.
- Small parts: Search Amazon for lid and straw bins to separate caps and valves.
- Cleaning support: Search Amazon for bottle brush sets for narrow mouths and straw channels.
Step 1: cap the active bottle inventory
Pull every reusable bottle, travel mug, shaker cup, straw lid, and spare cap into one place. Match each bottle with its working lid. Anything without a usable lid goes into a repair, recycle, or donation decision pile.
Keep a realistic active set: one daily bottle per person, one backup per person, and any true specialty bottle used weekly. The counter pile often exists because the household owns more bottles than the drying area can handle.
Step 2: choose the drying surface
A drying station needs airflow, drainage, and a limit. A vertical drying rack works better than a towel for tall bottles because it holds bottles upside down without letting mouths sit flat against wet fabric. Choose a rack with enough spacing for the widest bottle, not just the prettiest shape.
If counter space is tight, use a narrow rack beside the sink rather than a large mat that spreads into food prep space. The station should be easy to empty each morning. If clean bottles stay there all week, it becomes storage instead of drying.
Step 3: separate lids, straws, and gaskets
Small parts are the failure point. Put lids, straws, bite valves, and removable gaskets in a washable bin or divided tray while they dry. Do not toss wet parts into a dark drawer. If a lid has a silicone gasket, remove it according to the manufacturer’s instructions when it needs cleaning and let it dry fully before reassembly.
Cleaning brushes also need air. A brush left bristle-down in a cup becomes another damp object. Give the brush a hook, ventilated holder, or spot on the rack.
Step 4: build a daily emptying rule
The station works only if clean bottles leave it. Pick one daily moment, such as after breakfast or while unloading the dishwasher, to reassemble bottles and move them to one cabinet shelf or lunch-packing bin. Any bottle still wet gets another drying cycle; any bottle still sitting there dry is storage creep.
For school or sports bottles, use one labeled launch bin near lunch supplies. That keeps clean bottles from scattering between the sink, dishwasher, backpack area, and pantry.
Step 5: clean by parts, not by vibes
CDC hygiene guidance supports the basic idea behind this protocol: clean hands, clean surfaces, and clean frequently used items reduce germ transfer opportunities. For bottles, that means washing the bottle body, lid, straw, and gasket surfaces that contact mouths or drinks. Follow the bottle maker’s dishwasher and heat guidance, especially for insulated bottles and silicone parts.
If a bottle smells sour after washing, do not hide it in the cabinet. Disassemble it, inspect the lid channel, clean with the right brush, and dry completely. If the odor remains or parts are damaged, retire the bottle.
Add a weekly deep-reset loop
Once a week, empty the bottle cabinet and check whether the drying station is hiding a capacity problem. Match every bottle to a lid, inspect straws and valves, and remove any bottle that no one used during the week. If the cabinet contains event bottles, duplicate promotional bottles, or lids without bases, the drying rack will keep overflowing.
Give each person a maximum. For many homes, two active bottles per person is enough: one in use and one clean backup. Specialty bottles for hiking, sports, or travel can live on a higher shelf if they are used monthly. Anything less frequent should earn its space or leave.
Make the cabinet match the rack
The cabinet or shelf should hold the number of bottles the rack can dry in one cycle. If the rack holds six bottles but the cabinet holds twenty, the overflow will keep rotating through the sink. Use a single shelf, bin, or row as the active bottle zone, and do not stack bottles behind bottles.
Frequently Asked Questions
Can I use a dish towel instead of a drying rack?
A towel can work for one or two bottles, but it stays damp and lets tall bottles roll. A rack is better when several bottles, lids, and straws need air at the same time.
Should bottles dry with lids on or off?
Dry them with lids off. Lids and gaskets trap moisture when closed too soon. Reassemble only after the bottle and lid parts are dry.
What if the drying station is always full?
That is an inventory signal. Reduce active bottles, move rarely used bottles out of the kitchen, and check whether clean bottles are being left on the rack instead of put away.
Sources and safety notes
- CDC hygiene basics for clean hands, surfaces, and frequently handled items: https://www.cdc.gov/hygiene/about/index.html
- CDC food safety guidance on keeping kitchen surfaces and items clean: https://www.cdc.gov/food-safety/prevention/index.html